Thursday, August 15, 2013
Pinspiration and Back to School
I have big, big, Very big news! I am going "back to school". While spending 8 years in the Marine Corps was very rewarding and has led to much success in my life, I never really found the time to go back to school. I was always working too many hours or had too may other priorities. The time has finally come where I am out of excuses and full of excitement and the drive to finally finish!
I have been a little nervous about returning to school so much older than the average student. But I never really have grown up so perhaps I'll fit in or at least give everyone a laugh or two!
I would love to make some fabric book covers like the one pictured above and a pencil case - maybe one of the two pictured below or both. While a pencil case seems like a way to add fun to an everyday item, I also see it as a way to be organized. I'll be on the go constantly during the week balancing my normal 40 hour work week with three classes. I'll have to stay organized to be successful.
I have also already planned to make the Amy Butler messenger bag below as a way to carry text books and other items too and from class. I'll be able to easily switch from my work bag into my school in a matter of seconds with everything I need for either location packed neatly inside.
It also wouldn't be back to school if new clothes weren't involved. I am pretty excited about my back to school dress that I am working on. It deserves it own post so for now you'll have to wait, but I promise you are going to love it!
Tuesday, August 13, 2013
Chambray Laurel
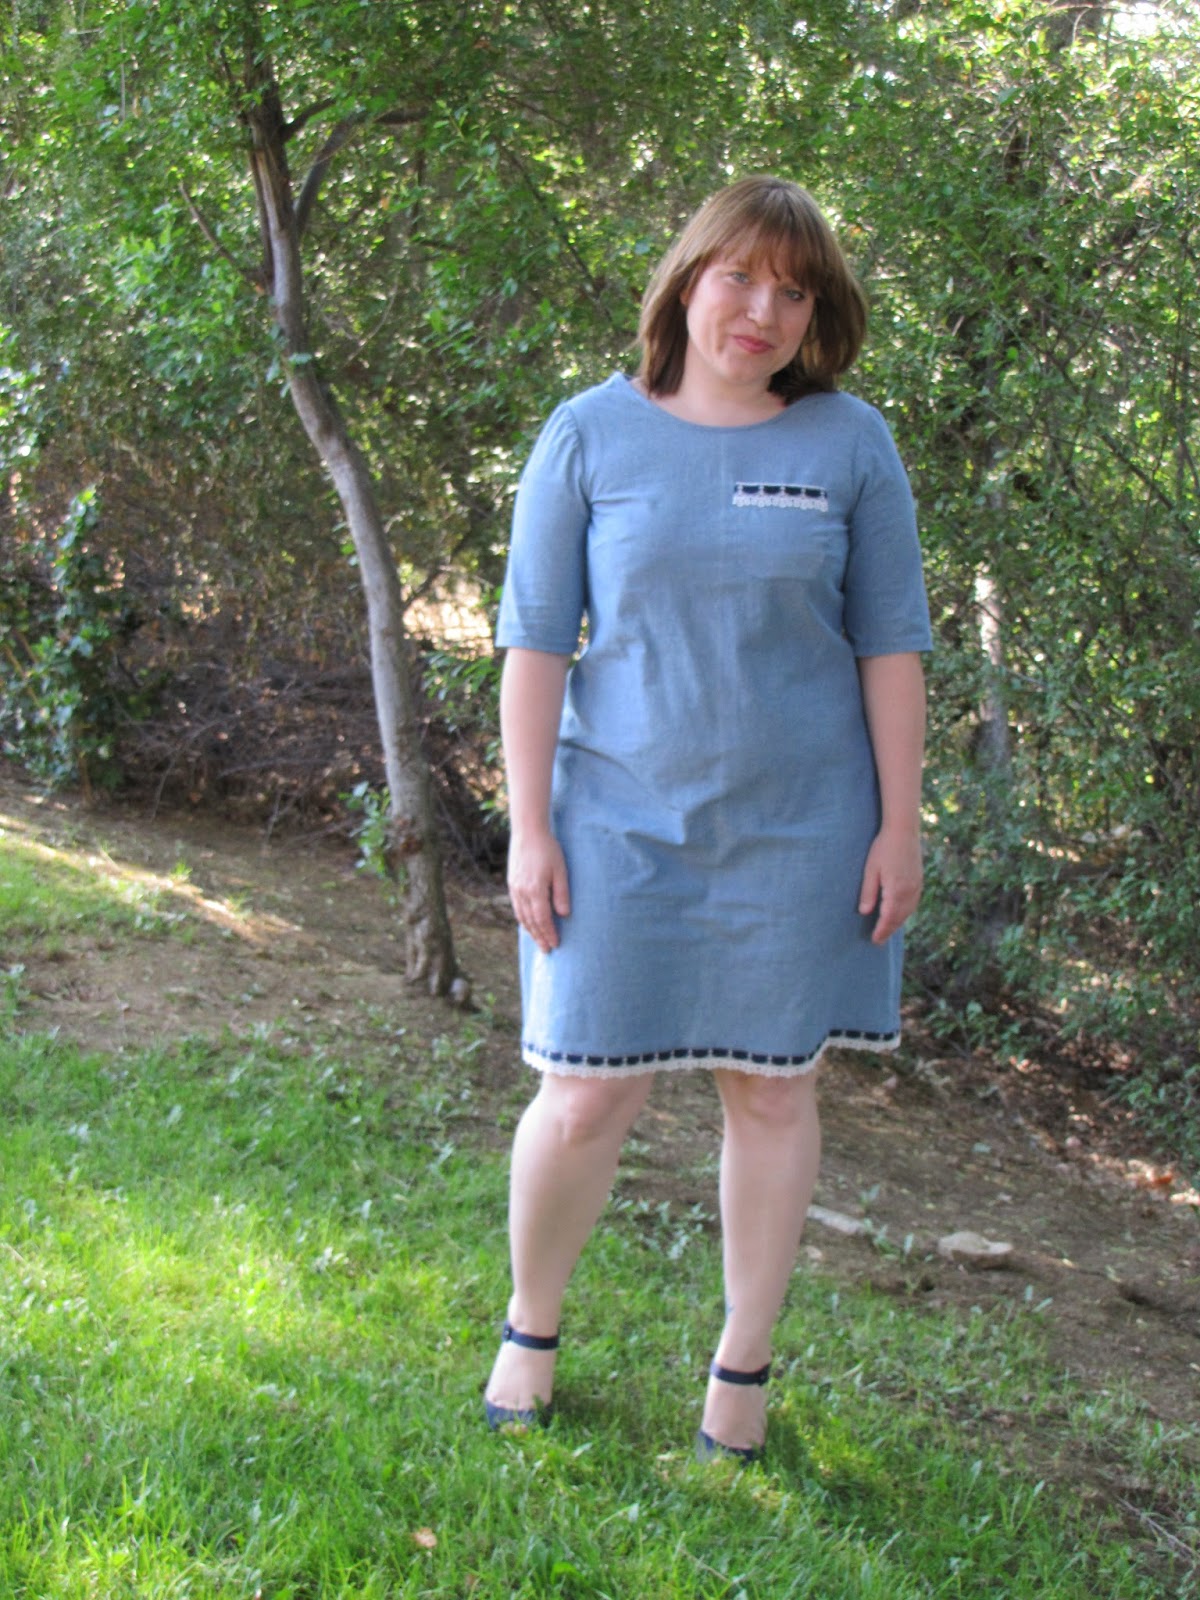
Pattern: Colette Pattern's Laurel
Fabric: Chambray from Baron's Fabric in Woodland Hills
Styled with: Blue Wedges (I have had them for years and forgot where I purchased them)
Let me tell you first that I love this pattern! It is simply beautiful and sews up fast. It is a great way to let a good piece of fabric "do the talking". However, something is just wrong with this version and I don't know what. Maybe the hem length?
I made this up in a Chambray from the local fabric store, which sadly is going out of business or rather has decided to only sell sewing machines. I purchased the last of the bolt at a steal and had some to spare after making this dress (Yay)!

I thought this might be sort of a homage to the original chambray shirt with a nautical twist with the trim. I don't know what do you think? Does it work? Or should I modification?

Friday, August 2, 2013
Summer Time Bowl Covers
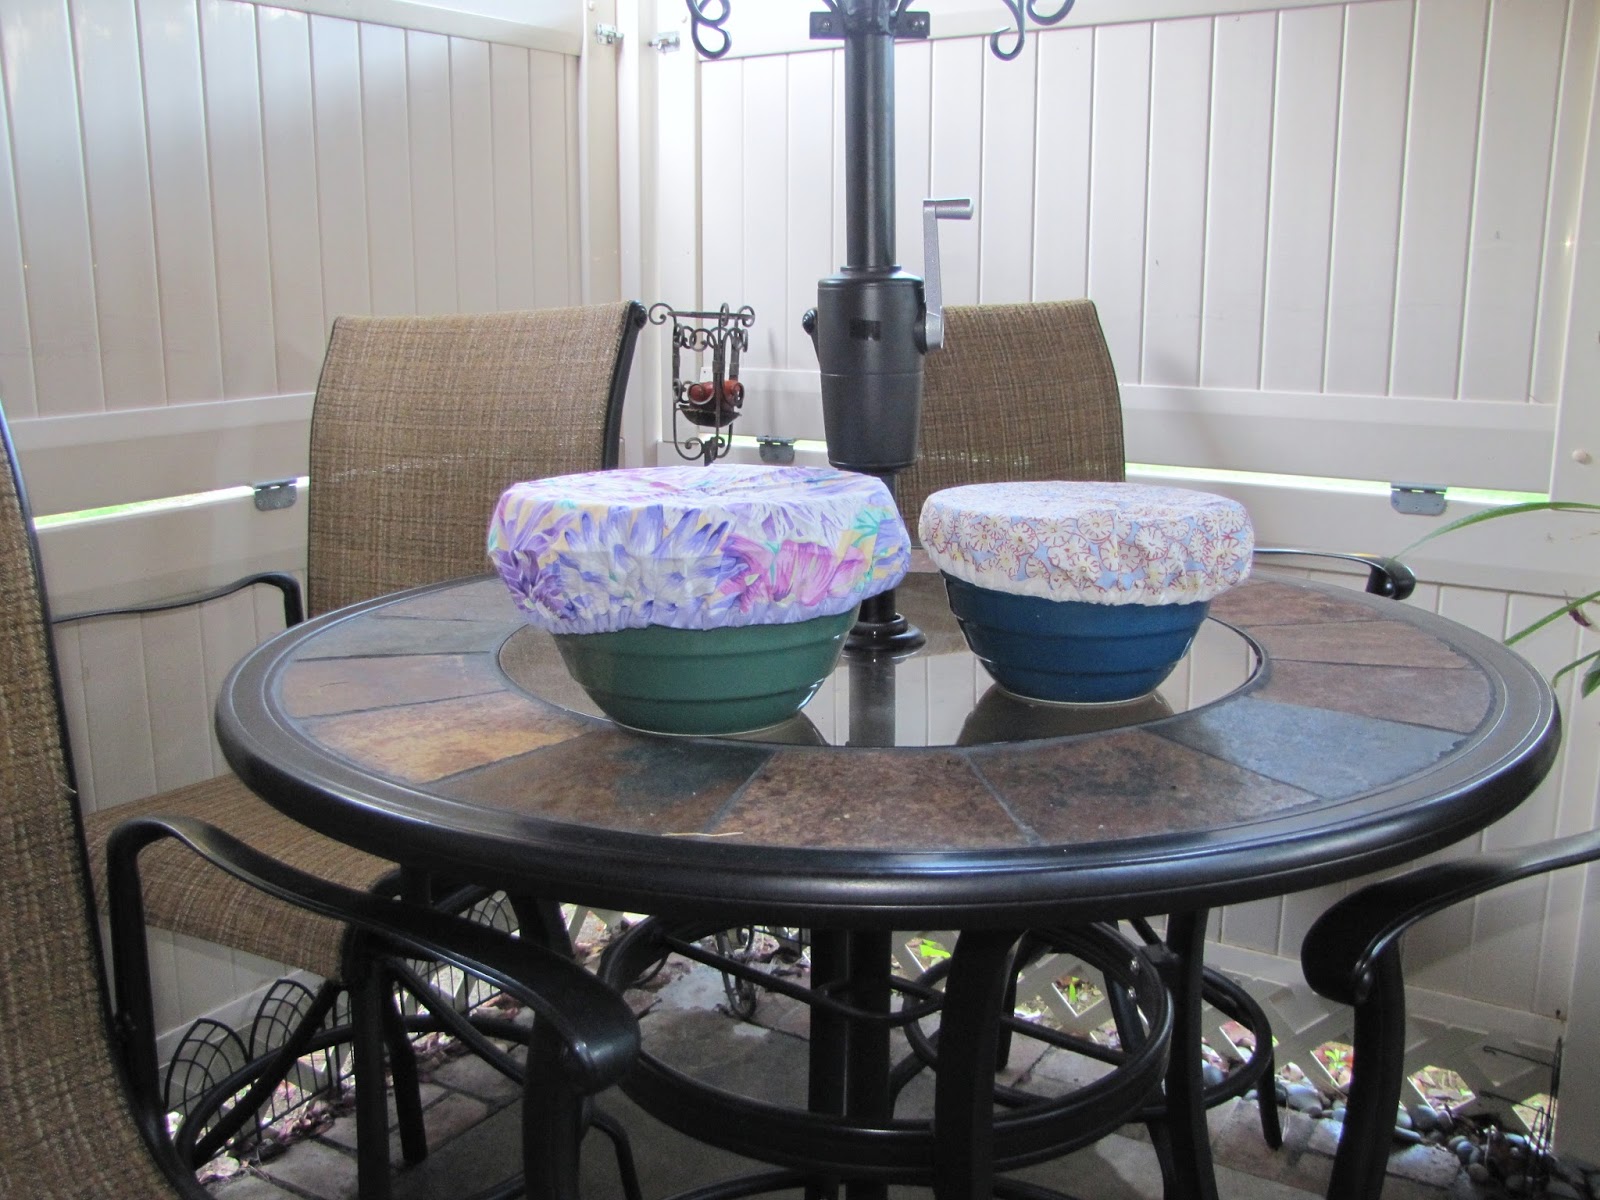
Project: Bowl Covers
Fabric: K. Fassett Fat Quarters
Bowls: Crate and Barrel Parker Bowls (no longer available)
Bowl covers are super easy to make and perfect for summer time picnics, barbecues and other get togethers. I love that you can essentially make your table setting beautiful while protecting your food from flies and maybe even deter little impatient fingers.
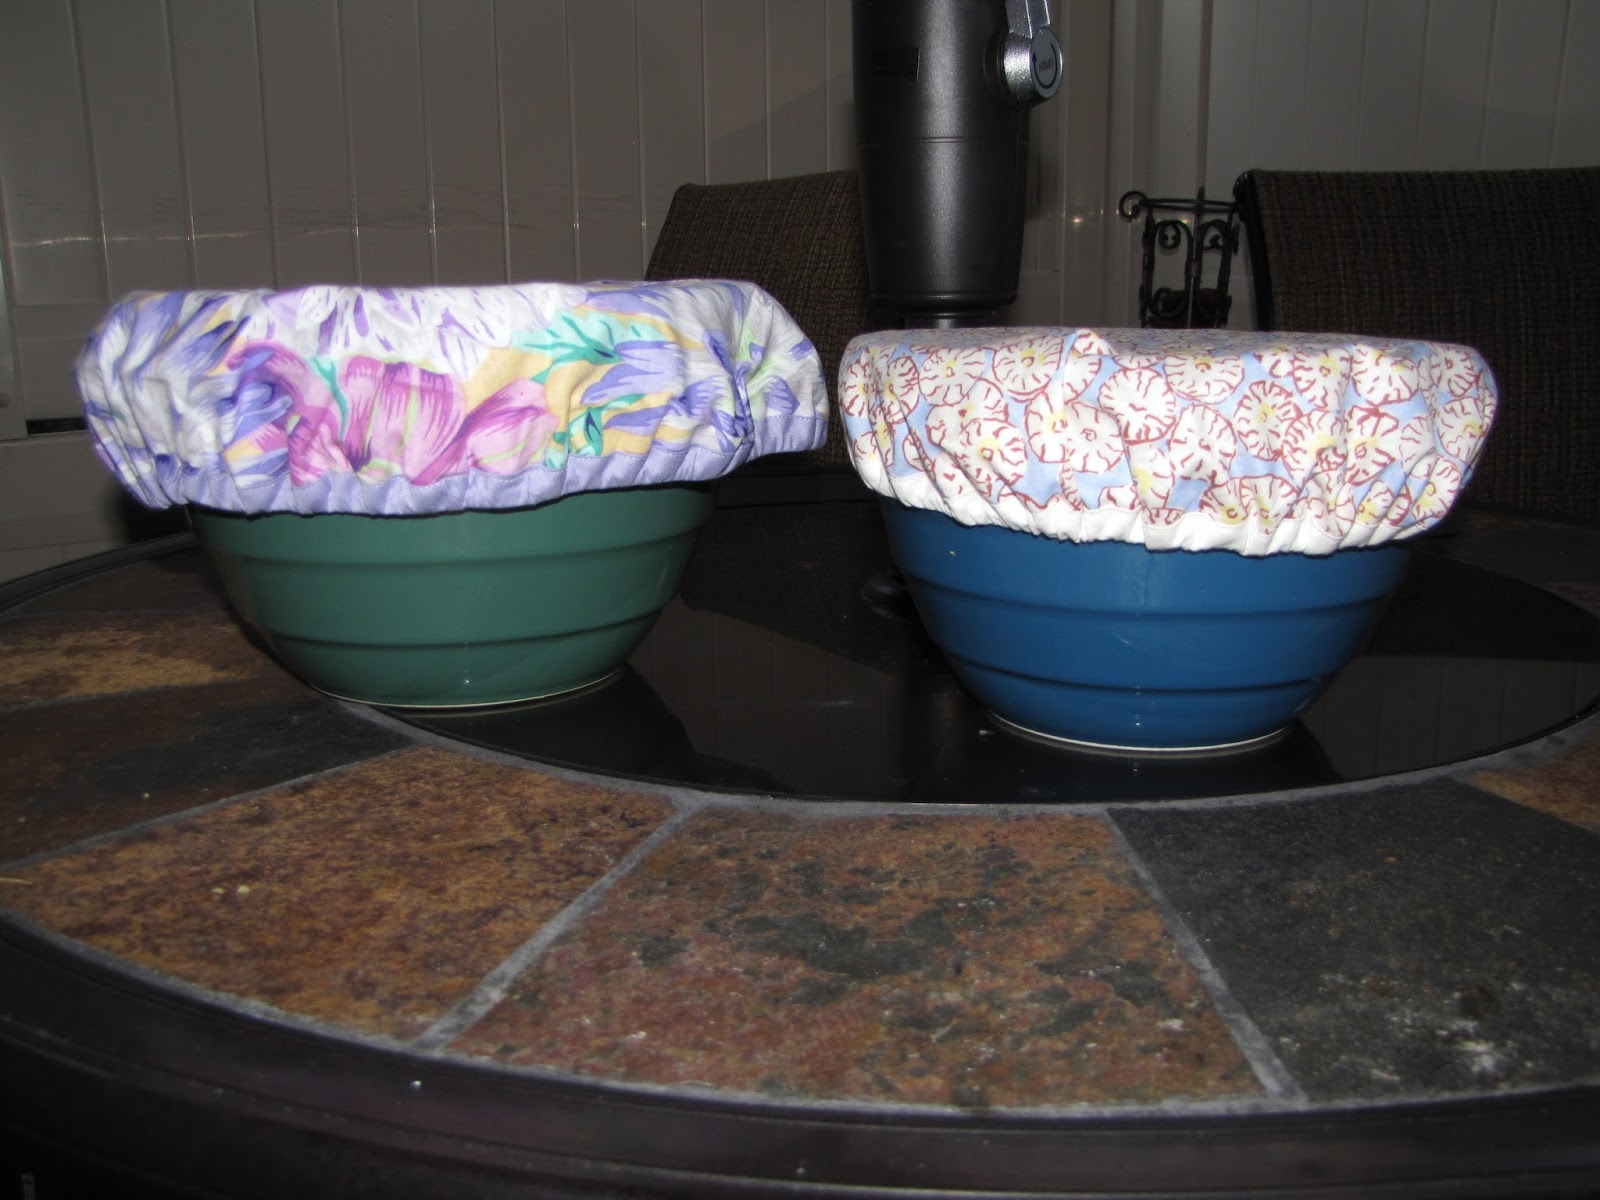
These are simple to make and can be adaptable to any bowl size. You might notice the green bowl is drowning just a little, I really made that bowl cover for a large white plastic bowl that I have. It is the most common one I take to potlucks because I really won't cry if I lose it, well maybe a little I have had it a long time. However, I thought it would photograph better with my Parker Bowls and I really intend to make a bowl cover for every one them eventually as I use up scraps and bits of fabric that compliment the bowls.
In other summer time news, BIG NEWS, my Plumeria plant is blooming!! My husband's family has a lot of households that have a plumeria or two and there seems to be a friendly competition of who can get their plumeria to bloom. While they survive quite well in California they are really more of a tropical plant and a can be a little finicky with it's blooms. We lost one completely over the winter, but with much luck and lots of TLC the survivor bloomed!!

Thursday, August 1, 2013
Smocking Class and Inspiration
I recently took a smocking class at my local quilting shop, Cotton and Chocolate, the same store I took my recent quilting class. The instructor was a well known smocker/heirloom sewing teacher who lives in the area, Vaune Pierce. She was a great instructor and is very passionate about smocking and teaching the art of smocking to others. We are pretty fortunate!
Many of you might already know this, but it really never clicked in my head this way before. Smocking is the art of embroidery on pleats. Well, I don't know how to embroider! I have been meaning to take a class or do a small project to teach myself, but haven't. I took the class with my mother-in law whose been doing needlework a long time so, if I needed extra instruction she was able to help.
We learned the cable stitch, trellis stitch and how to do a small flower. My practice pleat cloth is getting better, but I intend to fill it up with as much practice as I can before moving onto my first project. Sorry, not going to take pictures of it - I would rather inspire you with a few picture/pins I found via Pinterest.
Smocking can make gorgeous heirloom clothing for small children and the inspiration for that is abundant everywhere. I was actually surprised to find some designer clothing and a few adult sewing related items. It may be more rare but is absolutely gorgeous! I am dreaming of a dress with a smocking detail!
Tuesday, July 30, 2013
Finished Project - Scallop Hazel

Pattern: Colette Pattern's Hazel
Fabric: Black and White Polka Dot Eyelet with Scallop border (if I remember correctly it was from Fabric.com)
Styled with: Black flats and a white belt

For this revision, I really wanted to do something with a scallop hem. I had never done this before but I read through but I read through this tutorial provided by Colette patterns before beginning. This really helped take a lot of the guess work out of the process and on my first try everything lined up perfectly!
My only change to the basic pattern was to turn the regular straps into a Halter that ties in the back. Given that I already have a couple Hazel dresses and wanted this to be a go to casual summer dress it fit.
PS. You probably noticed, I got my hair cut a few weeks ago. It is a shoulder length layered style that I never really pictured as something that would look good on me. However, I found it is much more lively than my long hair and surprisingly I can style it more ways!

Monday, June 17, 2013
Cherry Licorice

I can't believe it has taken me so long to post pictures of this dress! This was the final garment I made for Sew Colette last year, but due to unforeseen circumstances I really didn't finish it until early this year.
I have had a hard time finding time to blog lately and an even harder time getting photos taken. I have still been sewing though and hope to get back on track in the coming months. I had a few things that just were not working for me and some of that has been resolved lately. Back to the dress...

I have to tell you I made this out of quilting cotton from Joann's, a mistake I probably won't make again. It is a pretty dress and I have got a lot of wear out of it, but it seems stiffer and heavier than other quilting cottons.
I was also really distracted while making this dress and was only sewing in about 15 minute increments or less during this time, I ended up cutting out the lining for the dress 2 other times due to mistakes with sewing, but I finally finished. I would love to make another of these dresses now that I am finding more time to sew.
Pattern: Colette Sewing Handbook - Licorice Dress
Fabric - Cherry Cotton
Styled with: Red Shoes from Nine West (barely seen in top photo)
Wednesday, March 27, 2013
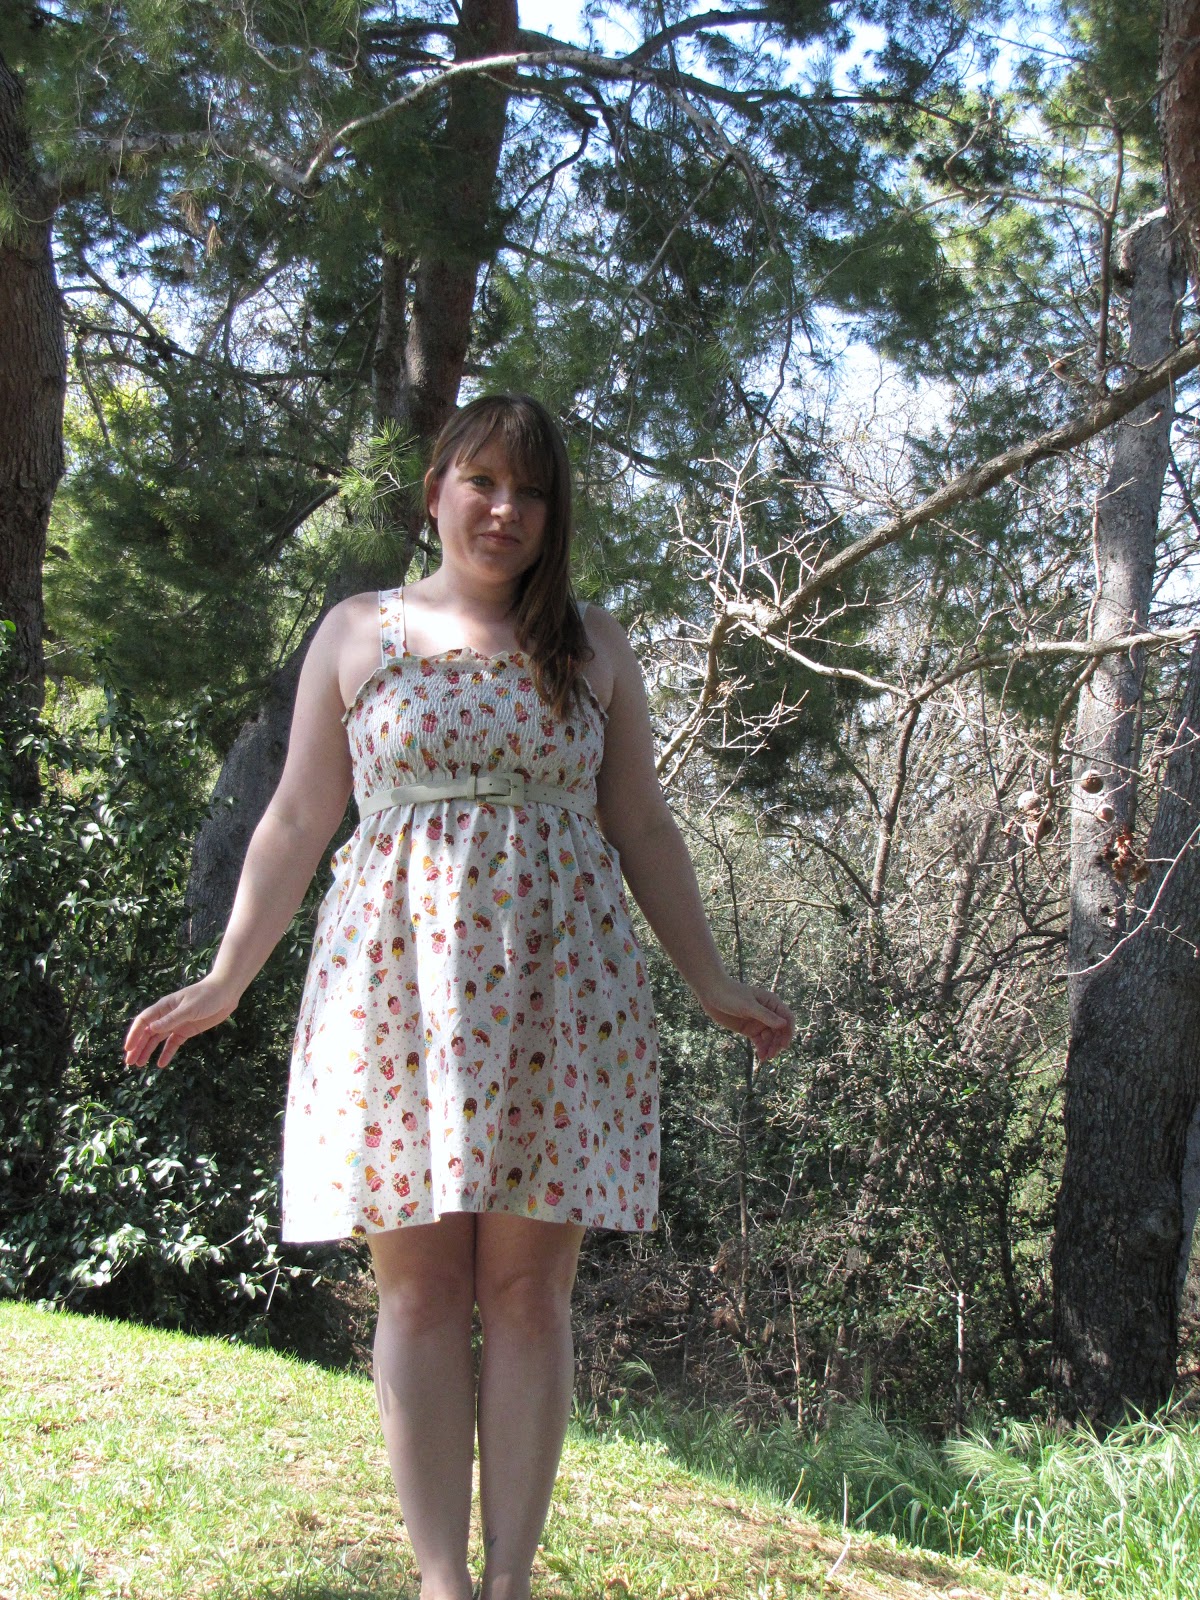
Ice Cream Dress

I can't believe it, but Spring is already here in Southern California and has been for several weeks! The beautiful tree pictures above is in my front yard and I get to enjoy it every time I enter or leave the front door.
After being under the weather for the past two weeks I am ready to get out and enjoy the sunshine! If you haven't had the flu yet this season -avoid anyone who has it like you would the plague!

Do you remember me posting about the Ice cream cone dress? I actually finished this many months back, but I chose such a plain pattern that when I got it put together I didn't think it was a chic as the original inspiration. I pretty much was going to avoid posting about it again altogether and really hadn't worn it much either, but it was also cold outside. I needed something quick to pull on the other day to run out and get dog food and run a few other errands. Wouldn't you know, in the short amount of time I was out I received many compliments! After that I figured I could be brave and post it on the blog. Sadly, I really don't have the proper accessories for this outfit to stand out. I think I would like to purchase this belt from Modcloth in the next few weeks to wear with this dress over the summer. What do you think?
Speaking of both Ice cream dresses and Modcloth, are any of you following the Carrie Diaries on the CW? Carrie was wearing this Modcloth dress which has ice cream and other yummies on a current episode and looked amazing.
Friday, March 8, 2013
Quilting Class Review

A few weeks ago I attended my first ever actual sewing class at Cotton and Chocolate Quilting Company in Thousand Oaks. I am pretty fortunate to live so close, as this store is pretty well known in the surrounding areas for having a wide array of amazing fabrics and fabulous instructors.
I ended up selecting the Friendship Braid Quilt class, the pattern is from this book: Jelly Roll Quilts and the sneak peak above is my quilt in progress.
My instructor Diane was awesome! She was not only a lot of fun, but I was impressed that she not only offered clear instructions to get us going, but was able to move fluidly around the class spending time with each of us and always seemed to be "right there" when you needed her most.
I would definitely recommend taking a class at Cotton and Chocolate if you happen to be in or live near the area.
In case you are curious the fabrics are once again Kaffee Fasett, can you tell I have a bit of a love affair going on? I have completed the vast majority of the piecing and once I decide on the border and backing fabric I will be finishing the quilt top and moving on to the sandwiching and quilting stages!
Other news, I mentioned awhile back a special surprise and here she is.......
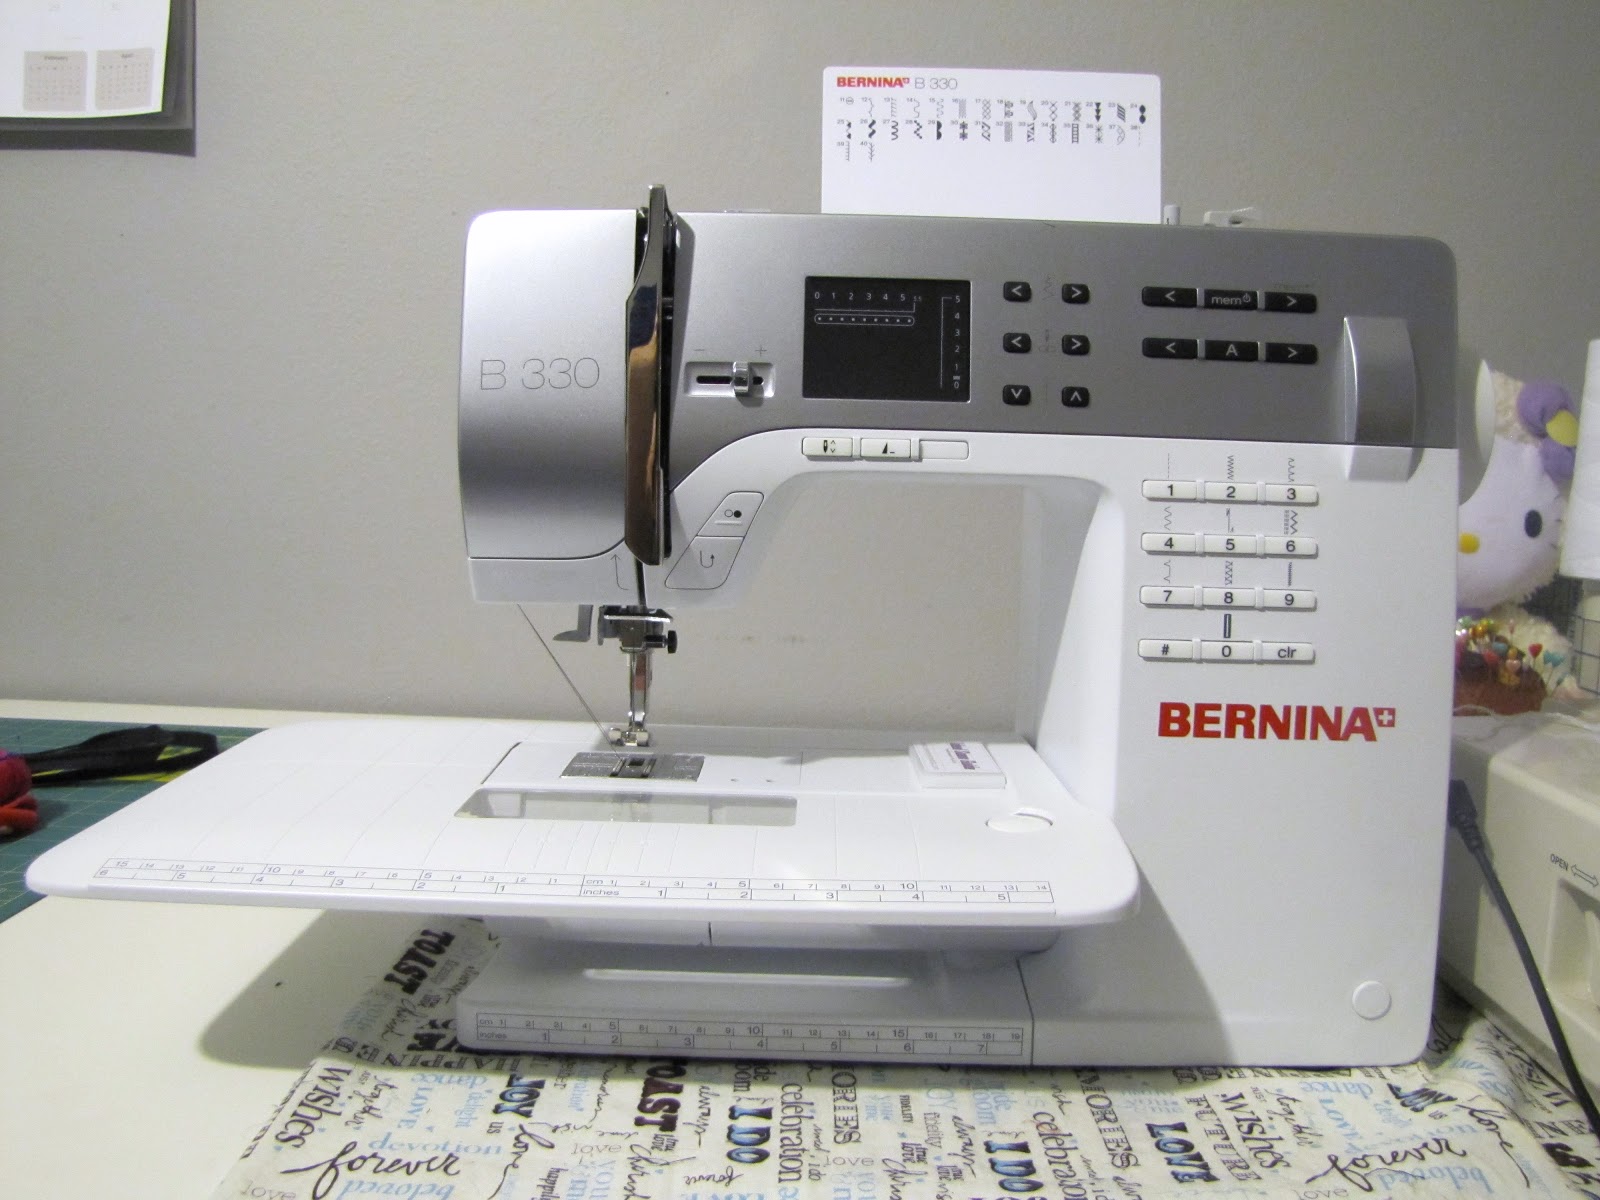
I have finally upgraded my trusty Hello Kitty sewing machine! After much research and a lot of thought I decided on a Bernina 330. While this is on the lower end of Bernina models it still has heads and tails more functionality than my Hello Kitty machine and the stitch quality (which was my chief complaint about the older machine) is beautiful!
This is looking to be an exciting year for sewing!
Thursday, March 7, 2013
Sew for Victory

As many of you may know by now Lucky Lucille is hosting Sew for Victory, a 1940's inspired Sew-along.
I am scrambling to participate but seem to have many an abundance of small projects piling up on my sewing table that are in some form of progress. We'll talk about those later, back to the Sew-along.
I have been trying not to over commit to ... I mean we all suffer from too little time too many projects, but I really want to participate in this sewing along and I had just purchased the perfect pattern that would help me keep things simple, Simplicity 1962 version B.
If you have been following along with the posts on Lucky Lucille you'll know that for notions I have a blue slide fastener as zippers were typically called back then and while my pictures do not correctly reflect it the button I purchased has a look similar to some of the buttons Rochelle posted from the Sears catalog pictures from the 1940's.
I also thought this small print fabric reminded me of fabrics you might have seen. However, the fabric is a silk chiffon, which from what I can recall would not have been easy to find with the rationing going-on.
Project photos are due March 29th which means I need to get the fabric and pattern cut pretty quickly and get to sewing! Are any of you participating? What are you making?
Thursday, February 21, 2013
Macaron

Pattern: Colette Patterns – Macaron
Fabric: Rosey, Cotton Gauze with white polka dots & Off-White cotton for contrast purchased from Hart’s fabric
Styled with: Shoes: Just Fab
Wear Again: You bet!
This was the second pattern from Colette’s that I ever remember seeing and immediately I wanted to make it! I am not sure why it took me so long to act on the urge except besides straight copying the white/blue sample from Colette’s I had a hard time finding fabric that I wanted to pair together.
However, when both Hart’s and Sew Colette 2.0 picked the same pattern for a sew-along in the same month – I had to get in on that and finally choose some fabric. Being the talented slacker that I am – I missed the deadline and this did not actually get sewn up until last month.
This is the perfect dress for work and I am sure I’ll make another in the near future.

Pattern Review: I have to tell you there are a few moments when constructing this dress that I seriously thought to myself that this pattern and set of instructions were pure genius! (The pockets and sleeves for instance) and at least one instance (once again the pockets) that I was extremely nervous that I was reading the instructions correctly.
I did have an issue with the fit of the sleeves, but I am sure that is probably me and something I should have adjusted for – I am just not sure what and my Google searches were of no help. Basically when I put the bodice on the sleeve area was too tight to then pull the dress back up over my head without secondary party (read: husband) assisting me out of the dress. The funniest part about this issue is that I could get the dress on just fine on my own and that it felt and looked comfortable – it just didn’t want to come off. I finally went in and surged again around the armholes this time as close to the regular line of stitching as I could without going over it in hopes that I would open up the area some. This actually works and I can finally get the dress over my head on my own. Has anyone heard of this type of fit issue and what is it called?


Wednesday, February 20, 2013
Red Quilt

I still haven't finished my Craftsy BOM quilt, but I did find time to piece together patchwork style some 6" charm packs from Kaffe Fassett's Fire collection. I thought these fabrics were so bold and beautiful that they could pretty much stand on their own and the simple pattern would allow them to POP!

This is probably the simplest type of quilt that you can put together. I literally just showed the little square together with a quarter inch seam in rows. I did use a guide I found on the internet that told me how many charm packs would equal the size quilt that I wanted. For the "quilting" portion of the quilt I did little tie tacks embroider on the corners of each square.

This quilt is a full size quilt without any overhang. It is almost perfect for just snuggling-up on the couch which was the main intention behind the quilt. To be perfect I would have liked it to be just a little wider.
For the back of the quilt I chose this cabbage and rose print from the same collection. I wanted the back of the quilt to stand out just as much as the front in this particular case.

I included this picture so hopefull you could see the litte tie tacks. I alternated between a pink and a red that I thought fit with the theme of the quilt.
For a first quilt - this was perfect! Now I am looking forward to piecing together something a bit more complicated.
Tuesday, February 19, 2013
Black Lily

Pattern: Colette Patterns – Lily
Fabric: Black Cotton Pique purchased from Denver Fabric
Styled with: Shoes: Poetic License purchased from Modcloth
Wear Again: YES! YES! YES! Maybe even make again!
This is actually my second version of the Lily dress. I made the first version a Lavender color during the Spring Palette Challenge 2012. However, I never really got around to taking pictures of it – even though I wear it quite frequently.
This version is no exception – and currently on high rotation in my closet! I love that I can pair it with everything and it is casual enough for work (when paired with a cardigan) but dressy enough for a date night out with my husband.

Pattern Review: While there are more pattern pieces than most beginner/easy patterns that is really the most time consuming or difficult thing about this pattern. The construction is straightforward and simple. I only needed my basic usual adjustments which was grading from a smaller size to a larger size and the fit is flattering and comfortable.
I could see this made up in a myriad of delightful colors! I am thinking of making a version with pocket and collar flap contrast as my next version. But first back to my goal of finishing the projects sitting in my wine crate….

Thursday, February 7, 2013
Update and other miscellaneous Information

First, I wanted to let all of you know that Corina of Geminae, previously Reverse Clothing has decided to focus on something else for the time being and because of that is hosting giveaways every Wednesday with a winner announced every Friday while seh depletes the remaining items from her clothing line/store.
I bet you are wondering if I have dropped off the face of the planet for another four months. The answer is - no! I have been busy sewing up a storm and have many new things to show you.
However, as part of my realization that I spent much of last year too stressed out to do much sewing and for some reason too stressed out to take care of myself, I have started a daily routine to ensure that certain things are accomplished. I am already feeling like a healthier, happier version of myself!
I still have some catching up to do in many areas and have been focusing on that, but I will be back to posting very soon. I actually can't wait to share a few things that I have made and some other sewing news of mine!
Thursday, January 10, 2013
Doggie Beds

Aren't both of my models above just gorgeous! Small, Medium, Large - all Beautiful! As someone who leans on the large size I often think of animals, and how their sizes, shape, colorings, all differ, but we - humans, who constantly seem to be searching for the perfect/ideal everything have a much harder time putting man's best friend in to this same small little box of perfection and tend to be more accepting of all the variations and differences. If we could only extend the same to each other. But well that wasn't really the topic of this post....
Usually I make a new dog bed every 6-9 months when the previous one becomes too worn for yet another wash. Good for my dogs, but bad for me they have a dog door that leads onto our outdoor patio which has trees, a small patch of grass/dirt, many plants, rocks etc. which they love to carry in when I am not looking and the outdoors usually end up in the dog bed. Just recently, I replaced the latest worn out dog bed with a new version of the same pattern. I didn't post pictures since you have essentially seen it before.
However, the Mr. asked me why I didn't make several dog beds for different areas of the house and because we have more than one dog. As you can tell from the picture above, they certainly do not mind sharing, but they do the love the dog bed(s) and they are easy and inexpensive to make. So, Operation: More Dog Beds has commenced.
For the dog beds, I usually just purchase fleece from Joann's either when it is on sale or I search through the remnants for larger pieces. I got lucky and both of the fabrics purchased above were large remnants and almost a full yard each. This makes for a really inexpensive project if you are debating make vs. buy.
I also decided to try a new pattern: Simplicity 2297 Version A. which is No Sew like the other dog bed but I got to learn the skills of using an Awl to punch holes in the fabric and then weave and gather to form some structure. It was easy, but the other dog bed takes less than an hour and this one probably took several between marking all the holes for punching and then using the awl for an initial once around punch, I found my holes were not large enough to weave the safety pin and fabric through so I had to punch each hole again before moving to the next.
One really good thing about this pattern is that all sizes are in the one envelope and they are on different tissue - so, if you plan to make multiple sizes you don't have to buy more than one pattern or spend your time tracing a dog bed!
For those of you, that are pet owners and looking to make something like this, you might worry about the stuffing. What dog doesn't like to rip all the stuffing out of their toys? And I know from experience with the other dog bed, if the double knots are not tight enough they can find away to dig-in and have a free for all with the "guts" of the dog bed. I can report that this weave and gather method has enough structure to be solid and after a week of wear the dog bed has remained intact.
Special thanks to my Sewing Helper - Pandora & the World's Largest Lap Dog - Hope for being such well behaved models! :)
Friday, January 4, 2013
Color of the Year Inspiration - Emerald Green

Belted Maxi Dress, Dog Cowl, Necklace, Blouse, Kiera Knightly Dress, Shoes, Green Sweater, Bracelet
Pantone announced it's color of the year a few weeks back: Emerald Green. This has been a long standing in my list of favorite colors so I am pretty excited to find lots of lovely emerald goodies.
Back when I was sixteen I purchased a short sleeved, angora wool, emerald green sweater. It was so soft and a simple cut just a plain knit stitch with a slight v-neck. I loved this sweater, but sadly it was lent to a friend and never returned. Oh how I have dreamed of that sweater ever since - maybe this is the year I recreate it for myself!
Thursday, January 3, 2013
Craftsy Block of the Month - September
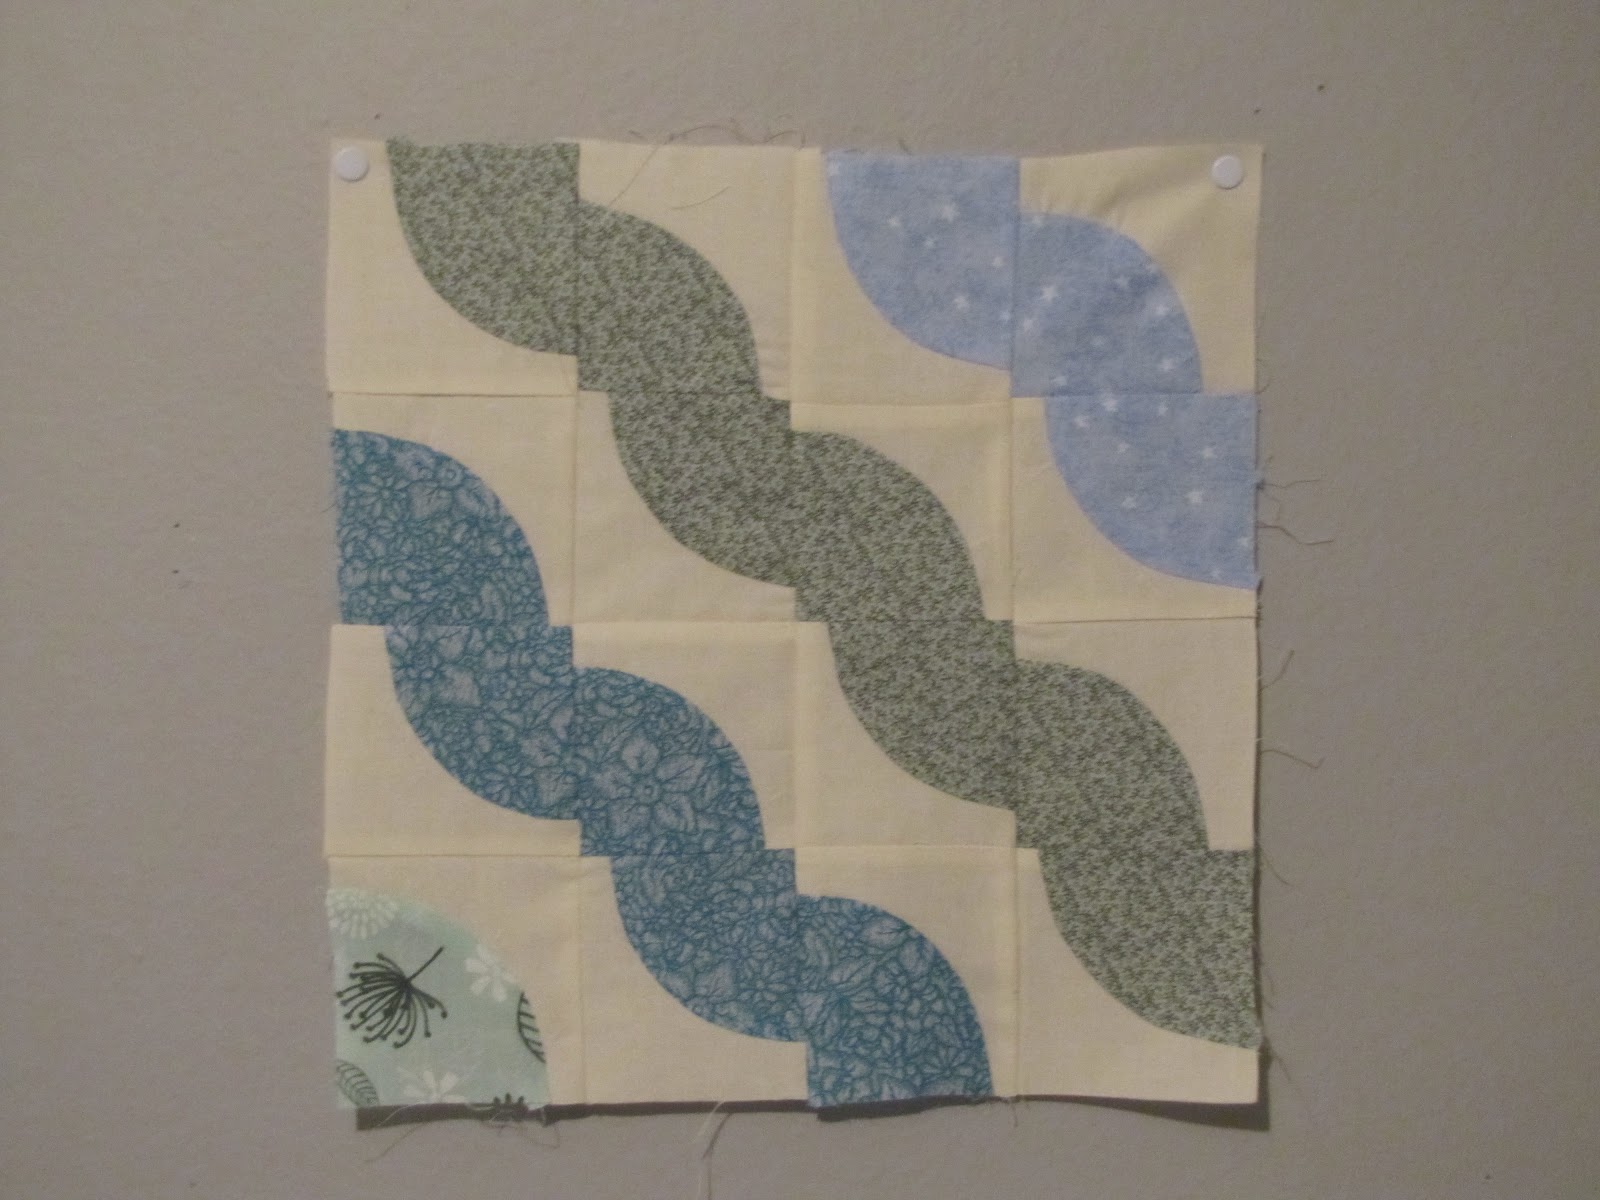
The September blocks for Craftsy Block of the Month were all about curved piecing. I really enjoyed putting these blocks together, but it was not without its challenges.

Sewing a curved seam is all about precision and easing your two fabric pieces into each other. I cut a couple extra and luckily worked the kinks of the process which involved some finger pressing of the two fabrics to help with the easing and strategic pinning. I also pulled out my dress makers pins though I mostly use extra fine pins anyways which helps if I get carried away and don't remove them as I am sewing.

The cooling thing about quilting blocks is since everything is in miniature they are a good place to practice skills you can use on garments. I sort of struggled in the past with curved seams on dresses. I am looking forward to some pretty awesome curved seams in the future!
Only one month of blocks left to go and then I can show off my quilt top! It is exciting to have learned so many skills and come so far over the past year.
Wednesday, January 2, 2013
Owl Sleep Better Tonight

It is been quite chilly here in Southern California lately, I would even say cold but then much of the rest of the Northern Hemisphere would probably laugh. Silly California girl!
I found that my closet is seriously lacking warm pajamas and began

My husband's parents did give me the cute sleepy owl fabric picture above last Christmas. However, it was only one yard which isn't nearly enough for pants. So, I got creative and combined it with the pink cotton above to make a night gown.
While this isn't as warm as pants would be it is super cute and manages to be warm enough for now. For the pattern I used Butterick B5653 which as it claims if fast and easy, but cut a few corners in areas that I didn't expect such as the straps being whip stitched on in the front to the lining instead of being sandwiched between the layers and sewn in. I sort of wish I had just done it that way myself instead of following the instruction. Next time.
Also, the pattern is sizes Small, Medium, Large etc. and has enough ease to pull over the head. While it is just pajamas - this doesn't make for the best figure flattering fit. I believe I could go a size down and still have ample room. I will have to try that.
I plan to make the top and pajama bottoms at some point. Since I don't have fabric and I am trying to do stash projects first this will have to be on the back burner for now.
PS - Yay! I finally got a dress form!
Tuesday, January 1, 2013
2013 Goals

I am looking forward to the New Year! 2013 for me, will be a year of setting my priorities correctly. The first being to take better care of myself which includes both putting things like eating healthier, exercise and spending time with my family first, but also includes spending some time doing what I love - sewing, knitting and other crafts.
Here is a list of my sewing goals for the year:
0. Finish my first quilt ( 0. since most of this work was done in 2012)
1. Sew my first coat
2. Participate in Sew Colette 2.0
3. Finish these Craftsy Classes that I am enrolled in: Knit this - Mastering Lace Shawls, Sassy Librarian Blouse, Sewing Texture, Sew Retro: Perfect Fit Bombshell Dress
4. Complete at least 2 sewing projects each month and 1 knitting or other craft type project.
5. Finish Sewing Room Makeover Items
While I am setting goals for myself it is mostly about cleaning up ideas, projects and money/time already spent last year scheming and planning. Most of the items above I have either already purchased patterns, fabric, notions or all of the above and it is about time I got to work on some of it!
My stash isn't large but it is larger than I want it to be so I will be working on reducing some of that. My solution was pretty simple to gather some of it up and pair it with the patterns and notions that I had already bought to complete "some day".

The wine crate pictures above contains 14 projects ranging from a purse, a pencil skirt, a patchwork quilt, to several dresses that I plan to work on when I am not directly working on one of the above goals. Let's see how well I do!
Happy New Year!
Subscribe to:
Posts (Atom)